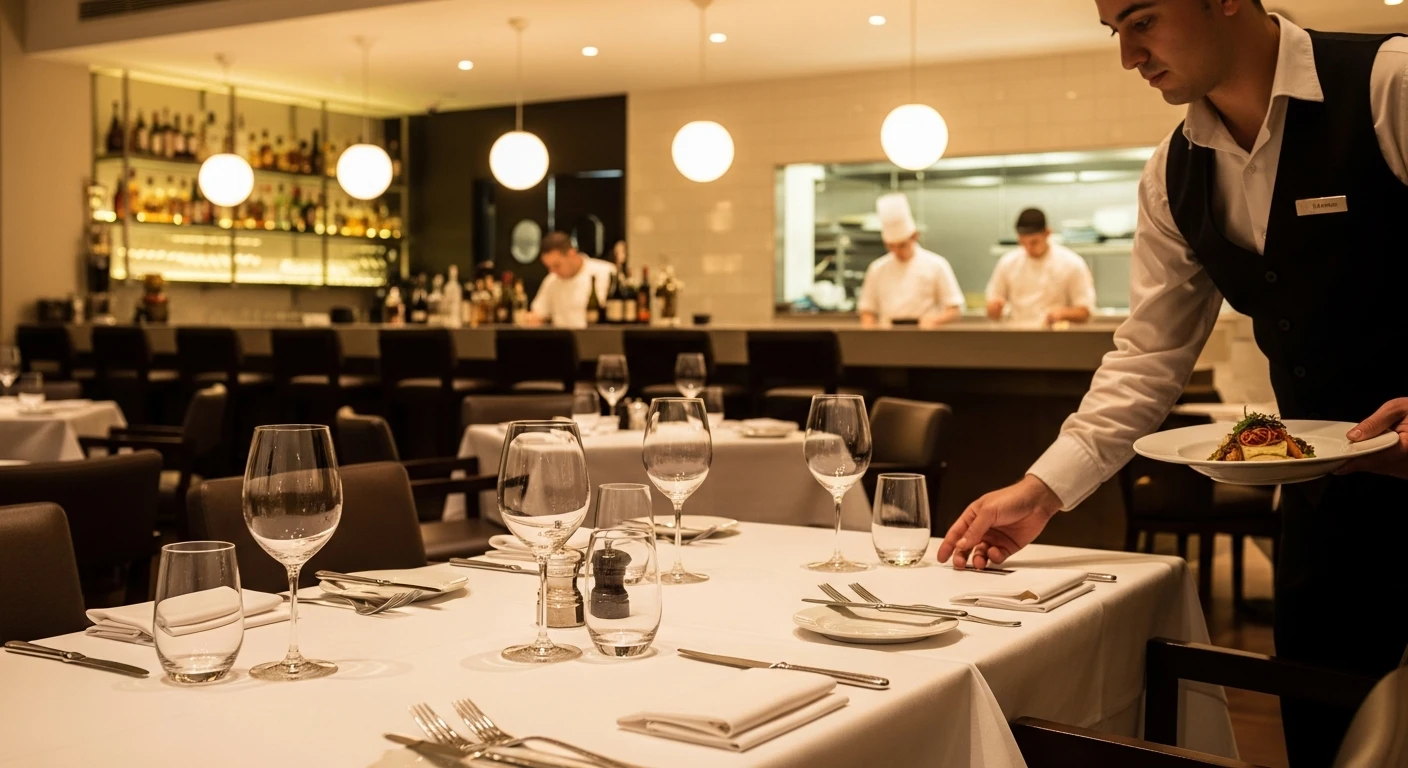
The best Complete Restaurant Opening Checklist handles everything from checkout to closing — without extra apps or workarounds. You signed the lease. You have the concept. You can already picture the dining room full on a Saturday night.
But between that vision and the moment your first customer walks through the door, there are 87 things that need to happen — in roughly the right order. Miss one and you are looking at a delayed opening, a failed inspection, a surprise $15,000 expense, or a first week so chaotic your Yelp page never recovers.
Here's the thing: most "restaurant opening checklists" online are generic, surface-level lists written by people who have never opened a restaurant. They tell you to "get a business license" without mentioning the 6 other permits you need before the health inspector will even schedule your pre-opening inspection.
This checklist is different. It is organized into 8 phases, ordered chronologically, with the dependencies made explicit. If step 34 (your grease trap installation) isn't done before step 47 (your health inspection), your inspector will walk out. We tell you that.
Print this. Pin it to the wall. Check things off as you go. This is the list that gets you from lease to launch without losing your mind — or your investment.
Phase 1: Business Formation and Financing (Months 1-2)
Before you spend a single dollar on equipment or renovations, you need the legal and financial foundation in place. Skip this phase and you are building on sand.
- Write your business plan. Not the 40-page MBA version. A clear document covering concept, target market, competitive landscape, startup costs, projected revenue, and break-even timeline. You need this for investors and lenders — and for yourself, to know when something is going off track.
- Choose your business structure. LLC is the most common for restaurants. It protects your personal assets if the business is sued. Talk to a restaurant-experienced attorney, not a general business lawyer.
- Register your business name. File with your state's Secretary of State. Check trademark availability first — the last thing you need is a cease-and-desist letter after you have already printed menus and signage.
- Get your EIN (Employer Identification Number). Free from the IRS. Takes 5 minutes online. You need this before you can open a bank account, hire employees, or apply for licenses.
- Open a business bank account. Separate from personal finances. Period. Commingling funds is the fastest way to lose your liability protection and create a tax nightmare.
- Secure financing. SBA loans (7(a) or 504), equipment financing, investors, personal savings, or a combination. Know exactly how much you need — most first-time owners underestimate by 20-30%. For more detail, read our guide to restaurant financing options.
- Hire a restaurant-experienced accountant. Not your cousin who does personal taxes. A restaurant CPA knows about tip reporting, FICA tip credits, Section 179 deductions, and the dozen tax deductions most owners miss.
- Hire a restaurant-experienced attorney. You need them for lease review, entity formation, and liquor license applications. Some of these have lead times measured in months, not weeks.
But it gets worse: most first-time owners think financing is a one-time event. It is not. You need enough working capital to cover 3-6 months of operating expenses after you open, because revenue ramps slowly. The average new restaurant does not hit its stride until month 4-6.
Phase 2: Location and Lease (Months 2-4)
Your location determines 60% of your success. The best food in the world will not save you if nobody can find you, park, or walk past your door.
- Define your location criteria. Traffic count, demographics, parking, visibility, proximity to competitors, delivery radius, and zoning. Your concept dictates your criteria — a quick-service spot needs foot traffic; a fine-dining restaurant needs destination appeal.
- Evaluate second-generation restaurant spaces first. A space that was previously a restaurant already has grease traps, hood vents, gas lines, and floor drains. This can save you $50,000-$150,000 in buildout costs and 3-6 months in construction time.
- Verify zoning before signing anything. Confirm the space is zoned for restaurant use. Some commercial zones restrict cooking, alcohol service, or late-night hours. A zoning variance can take 3-6 months and is not guaranteed.
- Negotiate the lease. This is a 5-10 year financial commitment. Negotiate tenant improvement (TI) allowance, rent abatement during buildout, CAM charges, exclusivity clauses, renewal options, and assignment rights. Read our lease negotiation guide — clause #7 alone can save (or cost) you six figures.
- Get the lease reviewed by your attorney. Non-negotiable. Landlords write leases to protect themselves. Your attorney finds the clauses that could bankrupt you.
- Conduct a site assessment. Hire an engineer or contractor to evaluate the plumbing, electrical capacity, HVAC, and structural condition. Discovering that you need to upgrade the electrical panel from 200A to 400A after signing the lease is a $15,000-$25,000 surprise you do not want.
And that's not all: the lease is where most restaurant owners make their most expensive mistake. A bad lease can cost you more than bad food ever will. If your landlord won't negotiate, walk away. There are other spaces.
Phase 3: Design and Construction (Months 3-7)
This is where your concept becomes physical reality — and where budgets go to die if you are not ruthlessly organized.
- Hire a restaurant-experienced architect or designer. Not a residential architect. Restaurant design requires knowledge of health code clearances, ADA compliance, kitchen workflow, and fire suppression requirements.
- Design the kitchen layout first. The kitchen dictates everything. Your menu determines your equipment, your equipment determines your layout, and your layout determines your plumbing and electrical needs. Work backward from the menu.
- Design the dining room for revenue. Every square foot should produce revenue. Calculate your revenue per available seat hour (RevPASH) target and design accordingly. Read more about restaurant KPIs and analytics.
- Submit architectural plans for permits. Building permits, mechanical permits, plumbing permits, electrical permits. Some jurisdictions require separate submissions for each. Lead time: 2-8 weeks depending on your municipality.
- Hire a general contractor. Get three bids. Check references from other restaurant projects. Include a completion penalty clause in your contract — every day of construction delay costs you rent with zero revenue.
- Order long-lead-time equipment. Walk-in coolers, custom hood systems, and specialty equipment can take 6-12 weeks to manufacture and deliver. Order these the moment your kitchen design is finalized.
- Install plumbing and electrical rough-in. Before walls go up, all pipes and wires need to be in place. This includes your grease trap, floor drains, hand sinks (you need more than you think), and dedicated electrical circuits for each piece of equipment.
- Install the hood ventilation system. Type I hoods for cooking equipment, Type II for dishwashers. Fire suppression (Ansul system) gets installed with the hood. This is inspected separately by the fire marshal.
- Rough-in for your POS system. Run ethernet cables to every terminal location, the kitchen (for KDS screens), and your back office. Do not rely on Wi-Fi for mission-critical POS hardware — a hybrid system like KwickOS uses local networking for 1ms response times and cloud sync for management.
- Install flooring, walls, and ceiling. Restaurant-grade flooring (quarry tile or sealed concrete in the kitchen, your choice in the dining room). Non-porous, washable wall surfaces in the kitchen. Acoustic treatment in the dining room unless you want one-star reviews about noise.
- Install the walk-in cooler and freezer. Verify that your refrigeration contractor sizes these correctly for your menu and projected volume. Undersized walk-ins are the #1 equipment regret of new restaurant owners.
- Install restrooms to ADA specifications. This is not optional. Grab bars, clearances, signage, door width — all specified by the ADA. Violations result in lawsuits, not just fines.
- Install your fire suppression and sprinkler system. Required by fire code. Must be inspected and approved before you can get a certificate of occupancy.
- Final construction walk-through. Punch list every deficiency before making final payment to your contractor. Photograph everything.
Here's the thing: construction always takes longer and costs more than quoted. Add 20% to your timeline and 15% to your budget as contingency. If you do not need it, great — you have extra working capital. If you do need it (and you will), you have it.
Phase 4: Licenses, Permits, and Legal (Months 4-8)
This is the phase where restaurants get stuck. Some permits depend on construction being complete. Some have 30-90 day processing times. Some require inspections that must be scheduled weeks in advance. Miss the sequence and your opening date slides.
- Apply for your business license. City and/or county level. Usually straightforward, 1-2 week processing.
- Apply for your food service license. State health department. Requires a plan review of your kitchen layout. Processing time: 2-6 weeks. Some states require this before construction begins.
- Apply for your liquor license (if applicable). This is the long pole. In some states, liquor license applications take 60-120 days. In others, licenses are limited by quota and can cost $50,000-$300,000 to acquire. Start this process immediately.
- Register for state and local sales tax. You are collecting and remitting sales tax from day one. Know your rates and reporting frequency before you open.
- Get your food handler certifications. Most jurisdictions require the owner/manager to hold a certified food protection manager (CFPM) certification. Some require all food handlers to complete a food safety course. Check your local requirements.
- Install your grease trap and get it inspected. This is step 34 — the one the title warned you about. Your grease trap must be installed, operational, and inspected before the health department will approve your kitchen. If it is undersized, you fail. If it is not connected, you fail. If there is no maintenance contract on file, some jurisdictions will fail you for that too.
- Schedule your fire marshal inspection. Hood suppression, sprinkler system, exit signage, fire extinguishers, maximum occupancy posting. Schedule this 2-3 weeks before your target opening date.
- Schedule your health department pre-opening inspection. This must happen after construction is 100% complete, all equipment is installed, and your grease trap is operational. Schedule this 2-3 weeks before your target opening date. Bring your food service license application receipt, your food handler certifications, and your equipment manuals.
- Apply for your certificate of occupancy. Building department issues this after all construction inspections pass. You cannot legally open without it.
- Apply for your signage permit. Exterior signage almost always requires a permit. Some municipalities regulate size, lighting, placement, and even font. Lead time: 1-4 weeks.
- Get your music license (BMI and ASCAP). If you play music in your restaurant — including Spotify, a playlist, or a jukebox — you need licenses from both BMI and ASCAP. Fines for non-compliance start at $750 per song played.
- Set up workers' compensation insurance. Required in almost every state before you hire your first employee. Shop rates — they vary dramatically by insurer.
- Get general liability and property insurance. Your landlord will require a certificate of insurance before you can take possession of the space. Typical restaurant policy: $1M per occurrence, $2M aggregate.
- Get liquor liability insurance (if serving alcohol). Separate from general liability. Covers you if an intoxicated patron causes harm after leaving your establishment. Some states require this for your liquor license.
But it gets worse: if any single inspection fails, your opening date moves. And every day you are paying rent but not generating revenue is money directly out of your pocket. At $8,000/month in rent, a two-week delay costs you $4,000 plus the revenue you are not earning.
Phase 5: Technology and Systems (Months 5-7)
Your technology stack is the nervous system of your restaurant. Get this wrong and you are running blind — no data, no efficiency, no control.
- Choose your POS system. This is the most consequential technology decision you will make. The wrong POS locks you into expensive payment processing, charges you for features that should be included, and owns your customer data. The right POS is processor-agnostic, works offline, and gives you everything — POS, KDS, online ordering, kiosks, CRM — in one platform. Compare your options carefully: KwickOS vs Toast vs Square vs Clover.
- Choose your payment processor. If your POS is processor-agnostic (like KwickOS), get three interchange-plus quotes and negotiate. If your POS locks you in (Toast, Square), you are stuck with their rate — and you are overpaying by $3,000-$8,000/year on average. Use our processing fee calculator to see the exact difference.
- Install your POS hardware. Terminals, kitchen display screens, receipt printers, cash drawers, card readers. Run ethernet to every station — do not depend on Wi-Fi for transaction processing. A hybrid system processes transactions locally in 1ms, so even if your internet drops, you keep taking orders.
- Configure your POS software. Menu items, modifiers, pricing, tax rates, discounts, employee roles, tip settings, and table layouts. This takes longer than you expect. Budget 2-3 full days for a new restaurant setup. Shogun Japanese Hibachi had their staff proficient on KwickOS in under 5 minutes — but that is after the initial configuration is done right.
- Set up your kitchen display system (KDS). Route items to the correct prep station automatically. A well-configured KDS eliminates ticket confusion and reduces food errors by 80%+. Read our KDS setup guide for best practices.
- Set up online ordering. Your own online ordering channel (not just DoorDash and UberEats) keeps more revenue in your pocket. Third-party platforms take 15-25% commission. KwickDriver charges a flat $2 + $6.99 per delivery within 5 miles — that's the difference between a profitable delivery order and a money-losing one.
- Set up your accounting software. QuickBooks or Xero. Integrate with your POS for automatic daily sales posting. Your accountant will thank you at tax time.
- Set up your scheduling software. Or use your POS platform's built-in scheduling if it has one. You need schedule creation, shift swapping, labor cost tracking, and overtime alerts from day one.
- Set up your inventory management system. Ideally integrated with your POS so that sales automatically deduct from inventory. Manual inventory tracking breaks down within a month — guaranteed.
- Install security cameras. Cover the register, the safe, back door, and walk-in cooler. This is not about distrusting your staff — it is about insurance claims, slip-and-fall liability, and theft by customers.
- Set up your internet connection. Business-class internet with a static IP. Minimum 50 Mbps download. Consider a cellular failover connection for redundancy — though if you are on a hybrid POS like KwickOS, your operations continue seamlessly even if the internet drops entirely.
- Set up your phone system and reservation platform. Google Voice works for many small restaurants. For higher volume, consider a VoIP system. Connect to Google Business Profile for direct booking.
And that's not all: the technology decisions you make now will cost you — or save you — tens of thousands of dollars over the next 3-5 years. Crafty Crab Seafood runs 19 locations and 152 terminals on KwickOS with one-click menu syncing across every store. T. Jin China Diner manages 15 locations and 75 terminals with real-time remote monitoring. That kind of scalability matters even if you are starting with one location, because if your first restaurant succeeds, your second will use the same platform.
Phase 6: Menu Development and Suppliers (Months 5-7)
Your menu is not just a list of food. It is your most powerful financial tool. Every item on it should be engineered for profitability.
- Finalize your menu concept. 25-35 items for a full-service restaurant. Fewer is better — every additional item adds complexity, waste, and training time. Your concept should drive your menu, not the other way around.
- Cost every single recipe. Ingredient by ingredient, to the ounce. Calculate your food cost percentage for each item. Target: 28-32% for most items, with some strategic loss leaders and high-margin stars. Learn the menu engineering matrix before you finalize anything.
- Set menu prices. Use food cost percentages, competitor pricing, and perceived value to set prices. Every $0.50 matters — on 100 covers a day, a $0.50 price increase on one popular item generates $18,250/year in additional revenue.
- Design and print your menu. Physical menus for dine-in. Digital menu for online ordering. QR code menu for tableside ordering if you are using that model. All of these should match and be easy to update when prices change.
- Source and vet food suppliers. Get quotes from at least 3 broadline distributors (Sysco, US Foods, Performance Food Group) and 2-3 local/specialty suppliers. Compare delivered prices, not list prices. Negotiate payment terms — net-30 gives you cash flow breathing room.
- Set up supplier accounts and delivery schedules. Coordinate delivery days so you are not receiving trucks every single day (unless your volume requires it). Most new restaurants can operate on 2-3 deliveries per week.
- Source smallwares. Plates, glasses, flatware, cookware, sheet pans, storage containers, cleaning supplies. Budget $5,000-$15,000 depending on your concept. Buy quality — cheap plates chip after a week in a commercial dishwasher.
- Create your prep lists and recipes. Standardize everything. Every recipe should include exact quantities, prep instructions, plating specs, and a photo. This is how you maintain consistency whether you are in the kitchen or not.
- Set up your waste tracking system. From day one. A waste audit in your first month will reveal $2,000-$5,000 in annual savings you would otherwise never notice.
Phase 7: Hiring and Training (Months 6-8)
You are not just opening a restaurant. You are building a team that will represent your brand to every customer, every day, without you standing over their shoulder.
- Define your organizational chart. Even for a small restaurant: GM/owner, kitchen manager/head chef, FOH manager, line cooks, prep cooks, servers, host, dishwashers, bussers. Know how many of each you need for your projected volume.
- Write job descriptions. Clear expectations, required experience, compensation, and schedule requirements. Post on Indeed, Poached (restaurant-specific), Craigslist, and local hospitality Facebook groups.
- Hire your kitchen manager/head chef first. They should be involved in final menu development, recipe standardization, and kitchen workflow design. A great kitchen manager is worth twice their salary in reduced waste, consistent food, and staff retention.
- Hire the rest of your team 3-4 weeks before opening. Earlier and they get restless waiting. Later and they are undertrained on opening day. Target: 1.5x the staff you think you need for the first two weeks, then adjust.
- Set up payroll. ADP, Gusto, or your POS platform's built-in payroll. Configure tip pools/tip outs, overtime rules, and pay schedules before your first employee works a shift.
- Complete all employee paperwork. I-9 forms, W-4 forms, direct deposit authorization, employee handbook acknowledgment, tip reporting agreements. Have a filing system ready.
- Create your employee handbook. Dress code, attendance policy, tip policy, harassment policy, food safety expectations, social media policy. Have your attorney review it.
- Train on food safety. Every employee who handles food needs to understand temperature danger zones, handwashing requirements, cross-contamination prevention, and allergen protocols. Document this training.
- Train on POS operation. Every server, bartender, host, and manager needs to be fluent on your POS system before a single customer walks in. KwickOS supports fingerprint authentication for clock-in — no buddy punching, no shared passwords. Diva Nail Beauty saw a 90% efficiency increase after implementing fingerprint-based employee tracking across 4 locations.
- Train on service standards. Greeting scripts, upselling techniques, table-touching cadence, complaint resolution procedures. Role-play these scenarios. Your staff will remember the practice more than the manual.
- Train on menu knowledge. Every server should be able to describe every dish, identify allergens, suggest pairings, and answer "what's good here?" without hesitation. Do a full menu tasting for all FOH staff.
- Conduct emergency procedure training. Fire evacuation, choking response, injury protocols, power outage procedures. Post emergency numbers and procedures in the kitchen and by the host stand.
Phase 8: Pre-Opening and Launch (Weeks 1-3 Before Opening)
You are in the final stretch. Every decision in this phase directly affects how your first week goes — and your first week determines your online reputation for months.
- Stock your initial inventory. Order everything you need for the first 5-7 days of operation. Err on the side of slightly over-ordering non-perishables and under-ordering perishables until you know your actual sales mix.
- Do a full equipment test. Turn on every piece of equipment. Run the dishwasher. Fire up every burner. Test every refrigerator temperature. Check every POS terminal. Process a test transaction. Fix everything that does not work perfectly.
- Set up your Google Business Profile. Hours, photos, menu, website link, phone number, booking link. This is where 73% of potential customers will find you first. Optimize it thoroughly — read our GBP optimization guide.
- Launch your website and social media accounts. At minimum: a one-page website with your menu, hours, location, and online ordering link. Instagram and Facebook accounts with 5-10 posts of your space, food, and team to establish credibility before you open.
- Conduct 2-3 practice services (friends and family). Full service, real food, real transactions through the POS, timed from order to delivery. These sessions reveal every bottleneck you did not anticipate. Your POS configuration will need adjustments. Your kitchen timing will need refinement. Better to discover this with friends than with paying customers.
- Host a soft opening (3-7 days). Limited menu, 50-75% capacity, invited guests. This is your dress rehearsal under semi-real conditions. Rockin' Rolls Sushi Express tested all 49 iPad self-ordering stations during their soft opening, refining the customer flow before going public. Use this time to identify which menu items take too long, which POS buttons are in the wrong place, and which staff need more training.
- Adjust based on soft opening feedback. You will change things. Accept it. Move the expo station. Rearrange the modifier buttons on the POS. Adjust prep quantities. This is what the soft opening is for.
- Plan your grand opening event. Invite local media, food bloggers, neighborhood business owners, and local politicians. Offer a complimentary item or discount. Generate buzz. Photograph everything for social media.
- Confirm all systems are go. Every license posted on the wall. Every inspection passed. POS processing live transactions. Payroll configured. Insurance certificates on file. Opening inventory stocked. Staff scheduled. Music license active. Signage installed.
- Brief your entire team the morning of opening. Roles, positions, expectations, emergency procedures. Acknowledge the reality that things will go wrong and that how you handle problems is what matters.
- Open the doors. Take a breath. You did 86 things to get here. The 87th is the one that counts.
- Post-opening daily review (first 30 days). Every night after close for the first month: review sales data, food cost variances, labor cost percentages, customer complaints, and staff performance. Your POS dashboard should give you all of this in real time — if it does not, you chose the wrong POS.
The Technology Decision That Affects Everything Else
Look back at this checklist. Your POS system touches steps 23, 43-54, 72, 77, 80-82, and 87. It is the single technology decision that impacts the most other decisions on this list.
Choose a locked-in platform like Toast and you are locked into their payment processing (2.99% + $0.15 per transaction), their hardware (proprietary), their online ordering (commission-based), and their ecosystem. You are paying $3,000-$8,000 more per year in processing fees alone — money that could fund your marketing, your staff, or your second location.
Choose a processor-agnostic platform like KwickOS and you choose your own processor, negotiate your own rates, own your own data, and get POS + KDS + online ordering + kiosks + digital signage + delivery management + CRM in one system that works even when your internet drops.
Tiger Sugar runs their 2 self-ordering kiosks on KwickOS with minimal-step customization for every bubble tea order. Baked Cravings runs a 24-hour self-serve kiosk at Lego Land. Haidilao trusts the platform across 600+ locations globally. The system scales from a single food truck to an international chain — and the technology decision you make in step 43 follows you for the life of your business.
Your Opening Timeline at a Glance
| Phase | Timeline | Steps | Critical Dependencies |
|---|---|---|---|
| 1. Business Formation | Months 1-2 | 1-8 | EIN required for bank account, insurance, licenses |
| 2. Location & Lease | Months 2-4 | 9-14 | Lease signed before permits, design, or construction |
| 3. Design & Construction | Months 3-7 | 15-28 | Kitchen layout drives equipment, plumbing, electrical |
| 4. Licenses & Permits | Months 4-8 | 29-42 | Grease trap (#34) before health inspection (#36) |
| 5. Technology & Systems | Months 5-7 | 43-54 | POS choice (#43) affects processing, ordering, KDS |
| 6. Menu & Suppliers | Months 5-7 | 55-63 | Menu finalized before POS configuration, supplier orders |
| 7. Hiring & Training | Months 6-8 | 64-75 | POS installed before POS training; menu finalized before menu training |
| 8. Pre-Opening & Launch | Final 3 weeks | 76-87 | All inspections passed before soft opening |
The Numbers That Matter
You are about to invest $175,000-$750,000 and 6-18 months of your life into this restaurant. Here are the numbers that determine whether it succeeds:
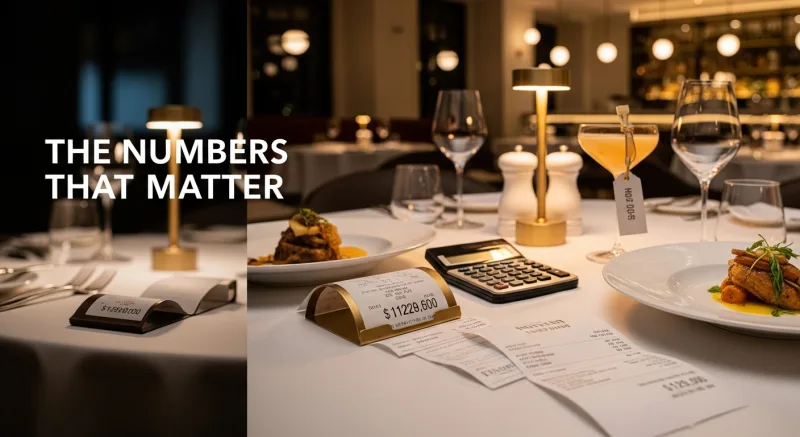
- Food cost: 28-32%. Higher and you are giving food away. Lower and your portions may be too small or your prices too high.
- Labor cost: 25-35%. Depends on your concept. Quick-service runs lower; fine-dining runs higher.
- Prime cost (food + labor): under 65%. This is the single most important number in your restaurant. If prime cost exceeds 65%, you are losing money regardless of revenue.
- Rent: under 8% of revenue. If your rent exceeds 10% of revenue, the math does not work unless your food cost is exceptionally low.
- Break-even: months 4-8. If you are not breaking even by month 8, you have a structural problem — not a ramp-up problem.
Track these numbers daily from day one. Not weekly. Not monthly. Daily. Your POS system should make this effortless — if checking your prime cost requires exporting spreadsheets and manual calculations, your technology is failing you.
Opening a Restaurant? Start With the Right Technology
KwickOS gives you POS, KDS, online ordering, kiosks, delivery management, and CRM in one platform — with the freedom to choose any payment processor. See why 5,000+ businesses trust KwickOS.
Get a Free Demo